When you work in trades, invoices are used in most transactions, so learning how to write one for contractor work is essential for managing your business.
Invoices track completed projects and help you get paid faster by communicating your preferred payment channels to each customer. They also ensure you’re compensated fairly by listing the products and services that were provided, and the cost of each one.
In this post, we’ll help you customize a free invoice template for your business. We’ll also give you some tips on what you should include in this document and when to send it to customers.

Email and Text Templates to Ask for Missing Payments
Tips and tricks to help you get paid on time.
Independent Contractor Invoice Template
Here’s an invoice template that you can save for later use. I recommend storing it in Word, Excel, or any other place where it can be easily duplicated. You can also use invoice software, if you have it.
|
INVOICE
|
|||
| {Your Name/Company Name or Logo}
{Address} {Phone Number} |
Invoice: #
Due By: x/x/xxx |
||
| Date: | |||
| Bill To: | Balance Due: $467.50 | ||
| Item | Quantity | Rate | Amount |
| Item 1 | 2 | $50.00 | $100.00 |
| Item 2 | 3 | $100.00 | $300.00 |
| Item 3 | 1 | $25.00 | $25.00 |
| Subtotal: | $425.00 | ||
| Tax: (10%) | $42.50 | ||
| Total Due: | $467.50 | ||
| Notes:
Accepted Payments: |
|||
Now that you’re equipped and ready, let’s talk about what you should include in your invoice.
What to Include in Your Invoice
Here are a few must-haves for any independent contractor invoice:
- Contact Information: This includes your name, address, email, phone, and any information needed to get in touch with you in case the customer wants to ask follow-up questions.
- Invoice Number: The invoice number assigns a number or code to the document, so you have a reference point to find it later. Simply search for the invoice number, and you’ll find all the information that you need.
- Current Date: You should also include the date that the invoice was sent to the customer. Compared to the billing date, this helps them understand how long they have to complete the payment.
- Billing Due Date: The billing due date lets the customer know when you will expect payment. This is an important detail to include, particularly if you charge late fees for overdue invoices.
- Customer’s Information: You should include the customer’s name and any relevant contact information from your CRM. Not only does this make it clear that the invoice is assigned to them, but it also helps you organize multiple invoices at once.
- Total Balance Due: This is the total value that you expect the customer to pay. It should be listed near the top of the document, as clearly as possible, so the customer doesn’t confuse it with any other number.
- Services Provided: This section should list each product or service provided to the customer. It should include the name of the item, its cost, and the quantity provided.
- Subtotal: The subtotal is the total cost of products and services provided before tax.
- Tax: If you charge a tax, you should include that calculation below the subtotal. Show the customer what the tax is and how much it adds to the final price.
- Notes: A notes section adds context to the charges on the invoice. This comes in handy when it’s hard to describe the services provided, or if you charge an additional fee, you can go into more detail to proactively address any questions the customer has about it.
- Payment Options: You should also let customers know which types of payments are accepted. Not only does this allow you to choose your preferred channels, but it also helps you get paid faster because customers know exactly how to pay you.
We’ve almost hit paydirt – but before we wrap up, let’s walk through how to collect this information and when to send it to your customers.
Email and Text Templates to Ask for Missing Payments
Tips and tricks to help you get paid on time.
How to Write an Invoice for Contractor Work
1. Refer to your contract with the customer.
Before filling out the template, go back and look at your contract with this customer. Review the terms and conditions, and make sure you’re complying with the agreed-upon payment structure. This document will also contain most of the contact information needed for this invoice.
2. Track and record your expenses.
Throughout the project, you should keep track of all the expenses that will be charged to your customer. That way, you can create an itemized list of products and services that justify the total balance on your invoice.
3. Complete your invoice template.
At this point, you should have most of the information needed to fill out the template above. Remember to add an invoice number, in case you need to locate this document later.
4. Send the invoice to the customer.
If your invoice is complete, give it one final review and send it to your customer. Try to send these out as soon as possible, so people have ample time to complete their payments.
If you’re having problems collecting payments on time, check out these tips:
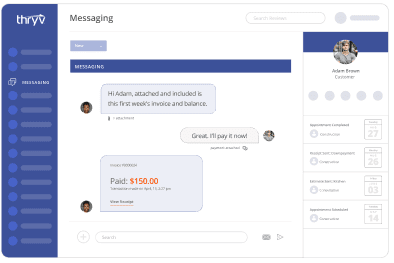
Pro Tip: This is where a centralized inbox can streamline communication with your customers.
5. Be ready for follow-up questions.
Some customers are bound to have questions about their charges. That’s why you should include your contact information, so they can get in touch with you. Just be prepared to make good on this communication when they eventually reach out. The good news is that your invoice should provide all the information needed to justify the total balance to each customer should there be any dispute.
6. Save the invoice to your CRM or document management software.
If you’re using a CRM or document management software, you should upload all of your invoices to your storage system. A CRM is ideal because it will assign each invoice to a contact record. That way, when you search for a customer, their past invoices will also appear.
If you don’t have one of these tools, I recommend using a free provider like Google Drive to store documents over time.
Getting Paid for Contractor Work
We get it. It’s hard enough doing the physical work. Things like invoices seem trivial when you’re installing plumbing systems and wiring houses. But at the end of the day, all your hard work goes down the drain (pun intended) if you don’t get paid for it. Use the template and tips listed above to streamline your payment processes, and your business will be that much more efficient.